Table of Content

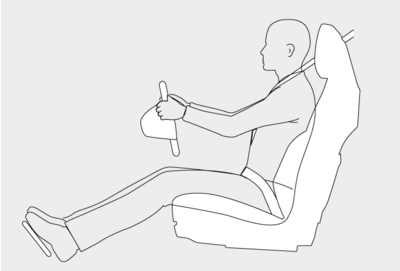
Adjusting the Front Seats

Warning: Do not adjust the driver’s seat while driving. Doing so increases the risk of collision.
Warning: Before adjusting a seat, check to see that the area around it is free of obstacles.
Warning: Do not sit in or operate the vehicle until you adjust all seats and head restraints to their proper position. Failure to adjust the seats and head restraints increases the risk of neck injury and other injuries in the event of a crash.

Front seats can be adjusted using either the seat-mounted switches or the Pilot Panel.

Using the Seat-Mounted Switches


  1. Position

    Move the seat forward/backward and adjust the seat’s height/tilt the angle up/down.

  2. Backrest

    Rotate the switch backward/forward to adjust the angle of the seat back.

  3. Lumbar

    Press the up/down buttons to raise/lower the lumbar support, and the left/right buttons to adjust the firmness of the lumbar support.

Using the Pilot Panel

Select >  SEATS to adjust the seats using the Pilot Panel.

Select the seat you want to adjust using the DRIVER or PASSENGER tabs.

Select the seat area you want to adjust from the side menu and use the arrow icons to modify the seat.

Note: The headrest, thigh support, and backrest width cannot be adjusted using the seat switches.

After adjusting the seat position, touch the SAVE TO PROFILE button to save the seat position to your profile. The RESTORE button restores the driver seat position for the active profile. Additionally, the RESTORE button is only active when the vehicle is not in motion.

Note: The headrest, thigh support, and backrest width are not available in all models/trims.

Correct Seating Position

The seat, head restraint, seat belt, and airbags work together to maximize safety. Using these features correctly provides greater protection in the event of a crash.

Warning: Seat belts are intended for use by adult-sized occupants. For children, see Child Safety.


To reduce the risk of injuries in an accident, follow these instructions:

  • The driver and front passenger must position their seats so that they correctly wear the seat belt whilst being as far away from the front airbags as possible.
  • Sit upright, place both feet on the floor, and make sure that the seat back reclines no more than 30 degrees.
  • You must be able to easily reach the pedals with your feet and slightly bend your arms while holding the steering wheel. The distance between the driver's chest and the center of the airbag cover should at least be 10 inches (254 mm).
  • Grasp the steering wheel on the steering wheel rim. Hold your hands at the 3 o'clock and 9 o'clock positions to reduce the risk of injury to your hands or arms if the airbag deploys.
  • Adjust the D ring position to position the shoulder section of the seat belt midway between your neck and your shoulder. Fit the lap section of the belt tightly as low and snug as possible around the hips, not the waist.
Warning: When the seat is in the reclined position, the shoulder belt and lap belt do not provide proper protection in an accident. In a collision, with the seat reclined, you can slip past or under the seatbelt and suffer serious injury.
Warning: Never drive the vehicle with the driver’s seat reclined.

Easy Entry & Exit

Easy Entry & Exit provide more space for the drivers, making entry and exit easier. You can move the SEATS or, SEATS and STEERING WHEEL creating more room for the driver during entry and exit. Easy Entry & Exit moves the seat back and the steering wheel up to the highest possible position.

Enable Entry & Exit

To enable Easy Entry, on the Pilot Panel press > DOORS & SEATS > Easy Entry & Exit.
Note: By default, this option is OFF.

Enter with Entry & Exit

Note: Activate the Easy Entry & Exit feature.
Note: If you select SEATS ONLY, the steering wheel will not move.
  1. When you open the driver's door, the seat and steering wheel will move to the Entry & Exit position.
  2. When you close the driver's door, press on the brake, or buckle the seatbelt. The seat, mirror, and steering wheel will move to your saved profile position.
    Note: If the vehicle reaches 10 mph (16 kmph), the seat movement will automatically stop to ensure your safety while driving.

Exit with Entry & Exit

Note: Activate the Easy Entry & Exit feature.
Note: If you select SEATS ONLY, the steering wheel will not move.
  1. Place the vehicle in Park.
  2. Open the driver's door. The seat and steering wheel will move to the Entry & Exit position.
Note: If the driver’s saved seat position is further rearward than the Easy Exit position, the seat will not move rearward on exiting with easy entry enabled. The steering wheel will continue to tilt to its maximum angle if it is not already in the maximum position on exiting.

Disable Easy Entry & Exit

On the Pilot Panel press > DOORS & SEATS > Easy Entry & Exit.

Massage Feature

Both front seats have a seat massage feature for comfort when seated for long periods of time.

To control the seat massage programs using the Pilot Panel, select >  MASSAGE.

Select the required seating position using the DRIVER or PASSENGER tab. Select the massage program you want to use from the side menu.

Note: The massage feature will select the last used program and intensity if you previously used it.

Press the START MASSAGE button to activate the seat massage feature.

Each massage program runs for 20 minutes. A countdown showing the remaining time will show on the screen. To stop the massage program, press the STOP MASSAGE button.

The intensity of the massage can be increased or decreased by pressing the or icons.

Note: The seat massage feature is not available in all models/trims.

Seat Heating and Ventilation

Both front seats have integrated seat heaters and ventilation.

Select to control seat heating and ventilation using the Pilot Panel. Press the corresponding icon to heat or ventilate the desired seat.


You can heat or ventilate the seats at three different levels:

  • Press once to operate at the highest level; three intensity indicators will illuminate.
  • Press twice to operate at the medium level; two intensity indicators will illuminate.
  • Press a third time to operate at the lowest level; a single intensity indicator will illuminate.
  • Press a fourth time to turn off the selected feature.

Pressing one of the two zones on the seats will deactivate heating or ventilation for that zone.

Note: Seat heating and ventilation cannot be used together. Changing the seat heating to ventilation stops the seat heating and turns on the ventilation feature. Similarly, changing the ventilation to seat heating stops the ventilation and turns on seat heating.