About Parking Experience
Lucid strongly recommends changing your tires at a Lucid Service Center to ensure an optimal Automated parking experience. Failure to do so may cause degraded performance and potential damage to your vehicle or wheels.
Lucid strongly recommends changing your tires at a Lucid Service Center to ensure an optimal Automated parking experience. Failure to do so may cause degraded performance and potential damage to your vehicle or wheels.
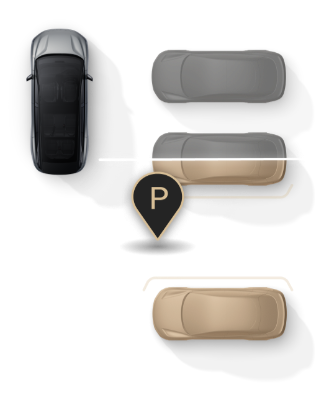
Automated Park In takes control of shifting, accelerating, braking, and steering the vehicle into a parking space.
Press ![]() on the Pilot
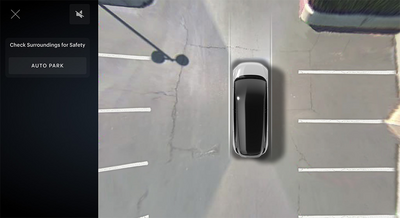
Panel then the system will launch the Surround and Parking View screen, tap into the
AUTO PARK button at the surround view panel to enable the
system to search for available parking slots.
on the Pilot
Panel then the system will launch the Surround and Parking View screen, tap into the
AUTO PARK button at the surround view panel to enable the
system to search for available parking slots.


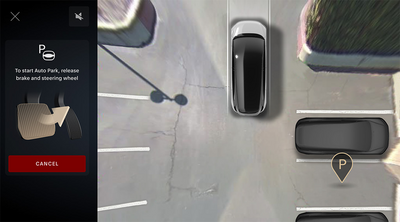
Detected spaces will be displayed on the Pilot Panel. An audible alert will sound when an available slot has been found. If you wish to park in a detected space:
Release the brake pedal and steering wheel to begin the parking maneuver when the system prompts you. An audible chime will sound when vehicle movement begins. The Rear View Camera will display on the Right Clearview Cockpit during Automated Park In maneuver and switch between the front and rear view accordingly.
The Pilot Panel will display parking in progress. Monitor your surroundings throughout the parking sequence and be prepared to take control of the vehicle at any time.
The Pilot Panel will prompt when parking has completed and an audible alert will sound. The vehicle will automatically shift into P when parking has completed.
During the automated parking sequence, the automated maneuver will be immediately canceled if any of the following incidents occur:
The vehicle will stop, emit an audible alert, and prompt the driver to take control of the steering wheel and brake pedal when the system is canceled. The vehicle will automatically shift into P (Park) if there is no response from the driver after 30 seconds.
You must start over at the beginning of the process and scan for a space if Automated Park In cancels for any of the aforementioned reasons and you wish to use the system again.
Touch ![]() settings >
settings > ![]() DreamDrive > Parking
Features on the Pilot Panel for Auto Park Wheel Curb
Assist in Automated Park In settings to enable or disable the
automated turn of the wheels according to the direction of the slope grade the
vehicle is parked in.
DreamDrive > Parking
Features on the Pilot Panel for Auto Park Wheel Curb
Assist in Automated Park In settings to enable or disable the
automated turn of the wheels according to the direction of the slope grade the
vehicle is parked in.
Automated Park Out takes control of shifting, accelerating, braking, and steering the vehicle, positioning it to pull straight out of a parallel parking space.
Automated Park Out can be engaged by pressing ![]() on the Pilot Panel to activate the
Surround View Monitoring and tap into the AUTO PARK
button.
on the Pilot Panel to activate the
Surround View Monitoring and tap into the AUTO PARK
button.

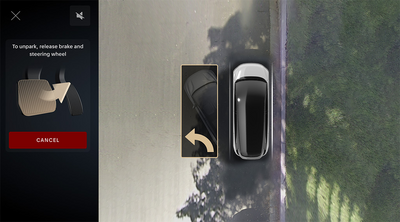
Release the brake and steering wheel to begin the pull-out sequence when the system prompts you.
An audible alert will sound when vehicle movement begins. A turn signal will activate in the direction you're turning out.
The rear view camera will display on the Right Clearview Cockpit during Automated Park Out.
The Pilot Panel will display Unpark in progress. Monitor your surroundings throughout the sequence and be prepared to take control of the vehicle at any time.
When the system has completed the sequence:
The gear will automatically shift into P (Park) if there is no response from the driver after 20 seconds.
Automated Park Out will be immediately canceled during the automated pull-out sequence, if any of the following incidents occur:
The vehicle will stop, emit an audible alert, and prompt the driver to take control of the steering wheel and brake pedal when the system is canceled. The gear will automatically shift into P (Park) if there is no response from the driver after 20 seconds.
You must start over at the beginning of the process if Automated Park Out cancels for any of the aforementioned reasons and you wish to use the system again.
The Surround View Monitoring system uses the exterior cameras to display the immediate vehicle surroundings in real time. This system will assist you in situations, such as parking or exits with reduced visibility.
Press ![]() on the Pilot Panel to activate the system. A
live video feed from the surround view cameras will display on the
Pilot Panel.
on the Pilot Panel to activate the system. A
live video feed from the surround view cameras will display on the
Pilot Panel.
Surround View Monitoring will activate automatically on the Pilot Panel when the gear is in R (Reverse).
Press ![]() at any time to close the screen.
at any time to close the screen.
Use any of the following screen gestures to manipulate the view:
Surround View Auto Dismiss will automatically close the Surround View after driving forward past the default speed of 16 mph (27 km/h).
Surround View Auto Dismiss can be set to dismiss at different speeds in the vehicle settings and saved to the driver's user profile:
To change the Surround View Auto Dismiss default speed go to Settings
![]() >
> ![]() DreamDrive Settings
> Parking Features > and select the
desired speed threshold from the menu.
DreamDrive Settings
> Parking Features > and select the
desired speed threshold from the menu.
Selecting the lowest dismiss speed, 0 mph (0 km/h), will prompt the system to close out Surround View and/or Rear View as soon as the drive selector has been switched from reverse R to drive D.

The Surrounding View Monitoring system will black out some portions of the video feed from the surrounding area in the following situations in addition to the limitations of Advanced Driver Assistance components (see DreamDrive Limitations):
Rear View Monitoring is an assist feature that will automatically display the rear camera view on the Right Clearview Cockpit when the vehicle shifts into R (Reverse). This feature is available when the vehicle is charging, and on any gear.
If Park Distance Warning is active, it will show a visual representation of the detected object as well as an approximate numeric value in user-defined units (in/cm), based on the selected distance (UoM) under Settings.
Park Distance Warning overlays can be turned off under ![]() Settings >
Settings > ![]() DreamDrive > Parking Features > Park
Distance Warning. Deactivating Park Distance Warning will affect
Rear View Monitoring overlays.
DreamDrive > Parking Features > Park
Distance Warning. Deactivating Park Distance Warning will affect
Rear View Monitoring overlays.
When Rear View Monitoring is active, path guidance overlays cannot be turned off.
Rear View Monitoring is not available for a given view (front/rear) when the hood/liftgate is open.
Press ![]() on the Pilot Panel to manually
activate Rear View Monitoring.
on the Pilot Panel to manually
activate Rear View Monitoring.
The standard view button is automatically selected upon Rear View Monitoring activation. Tap on the wide button on the right side of the screen to activate a wider field of view.
In DreamDrive Premium and DreamDrive Pro, the Rear View Monitoring includes front view. It can be selected by tapping the front button on the left side of the video display window, or shifting to D (Drive) while Rear View Monitoring is open.
Rear View Monitoring is available at speeds below 16 mph (27 km/h). For Auto Dismiss behavior, refer to Surround View Auto Dismiss.
For vehicles with trailer package, Rear View Monitoring includes a hitch view that can be selected by tapping the corresponding button on the right side of the video display window.

Perform any of the following to manipulate the camera view:
Park Distance Warning uses the exterior sensors to provide you with visual and audible alerts when the vehicle is slowly moving towards a potential hazard.
The system will provide visual and audible alerts on these camera views when it is enabled:
Right Clearview Cockpit:
Pilot Panel:

The shade of the visual indicator represents how close your vehicle is to an object.
The visual indicator will gradually intensify to a darker shade of red as your vehicle approaches an object. If this happens, apply the brakes to slow the vehicle and take any other appropriate corrective action.
Touch ![]() >
> ![]() DreamDrive on the Pilot Panel then
enable or disable Park Distance Warning to configure Park
Distance Warning settings. The settings will save to the current user profile.
DreamDrive on the Pilot Panel then
enable or disable Park Distance Warning to configure Park
Distance Warning settings. The settings will save to the current user profile.
When Rear Parking Protection is enabled, the system can automatically brake for you if it detects objects in the vehicle's driving path as you manually reverse maneuver at parking speeds.
Once Rear Parking Protection is engaged, the user can override the braking intervention by taking their foot from the accelerator pedal and pressing again, pressing the braking pedal, or switching gear from R (Reverse) to D (Drive).
In the case that the braking is not being overridden, the system will hold the vehicle stationary while waiting for the driver to take over control. If there is no action from the driver 20 seconds after engaging the brake, the vehicle will switch gears automatically to P (Park).
Touch ![]() >
> ![]() DreamDrive on the Pilot Panel, then enable or
disable Rear Parking Protection.
DreamDrive on the Pilot Panel, then enable or
disable Rear Parking Protection.
The Rear Parking Protection system offers two braking intervention levels, normal and late. This will determine the comfort level of braking the vehicle and how early or late a braking intervention is triggered toward an obstacle. For example, the braking level LATE will trigger a braking intervention when the vehicle is closer to the obstacle and the braking force will be higher than the one in the Normal setting.
Turning the feature ON/OFF and the braking level preference are saved to the current user profile.